How to Make Delicious and Failproof Cold Brew at Home: A Simple Guide
Cold brew is absolutely delicious, there’s no question about that. However, it could be a costly pursuit if you have to get your fill every day at your nearby Starbucks. That’s why so many people are looking for ways to DIY their cold brew at home.
Making cold brew at home is extremely easy. It’s as simple as grinding up coffee, immersing them in cold water, then filtering your brew. However, achieving the flavor that you love is another thing. Some try making cold brew at home for the first time and end up getting disappointed.
If this is you, or you’re worried that this might happen to you, then you’re at the right place. We’ll walk you through how you can successfully make cold brew at home every single time.
Keep reading to find out how to make failproof cold brew at home!
What you’ll need to make cold brew at home
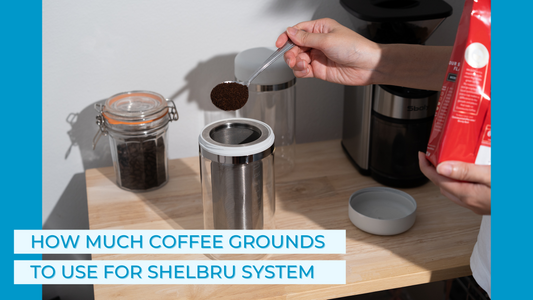
Before you get started, you’ll need the proper tools. Don’t let the word ‘tool’ scare you. It really doesn’t require much. If you’re on a tight budget, you can easily make cold brew by using a large bowl or a jar. (Fill it with coffee grounds and water, steep overnight, then strain with a cheesecloth or paper coffee filter.) This method can be more time-consuming and messier, but it’s cost-effective and gets the job done. You can also opt for cold brew makers (like our Cold Brew System) that are specifically designed to make cold brewing a piece of cake.
Now that you have your cold brew set up, let’s jump into some of our tips on how to make failproof cold brew!
#1: Use medium to dark roast
Cold brew is known for its sweet, smooth, chocolatey flavor. And those flavors are best extracted from medium or dark roast beans. Light roast isn’t as popular as the flavors can taste more sour after extraction. Hey, but we’re not here to stop you from trying! In the end, it all comes down to preference!
#2: Coarse ground
Cold brew works the best with coarse ground coffee. Your ground should be about the size of sea salt. Coarse ground coffee makes it easier for water to penetrate and extract flavors. A fine grind, like what you would use for espresso, will lead to over-extraction and make your cold brew bitter and muddy.

We love grinding our own beans at home with a burr grinder. (Who doesn’t love the smell of freshly ground coffee?) However, if you don’t have a grinder at home, you can purchase pre-ground coffee beans (make sure they’re coarsely ground) or some grocery stores have grinders you can use.
#3: Ratio matters
This is one of the most common questions we see when it comes to making cold brew at home. Simply put, ratio refers to the amount of coffee in relation to water. If you have already done some prior research, you’ll realize that there’s no one-size-fits-all answer to this. Depending on who you talk to, you’ll find answers varying from 1:10 ratio to 1:4 ratio. This is because the cold brew ratio is all down to preference. While we like to tell people to experiment with different ratio to get the flavor and strength you like best, for the sake of this post, we’ll just lay out the basics.
Just remember..
The higher the ratio of coffee to water, the stronger your cold brew will be. And the lower the ratio, the weaker your cold brew will be. People generally use a higher ratio (ex: 1:4) to make cold brew concentrate, which can be diluted with water or milk later. A lower ratio (1:10) is used to make ready-to-drink cold brew, which doesn’t need dilution.
Here at Shelbru, we love a good 1:4 ratio, because cold brew concentrate can be super versatile. We use the concentrate to drink it black or make a delicious latte. You can even put it in smoothies, and make cocktails with it. Also, it’s much easier to dilute a strong concentrate to your liking, but you won’t be able to make a weak coffee stronger.
#4: Time
Time is another important factor to consider. Generally, cold brew takes between 12-24 hours to brew. And it’s totally up to you to experiment with that range. Here’s another basic rule of thumb to remember: the longer you brew, the stronger your cold brew will be, and vice versa.
So combined with #3, you can now experiment with both ratio and time. Here’s a visual guide on how the two factors work together, and how you can make cold brew that you like.

#5: Use filtered water
For best tasting cold brew, we highly recommend using good-quality, filtered water. You can still use tap water but check with your local water sources first to make sure it doesn’t contain chlorine or other hard agents.
Summary
So there you go, folks! Here’s everything you need to know to make a delicious, failproof cold brew at home! I know we covered a lot above, but all you need to remember are:
- Medium to dark roast
- Coarsely ground
- The higher the ratio, the stronger your cold brew will be. The lower the ratio, the weaker your cold brew will be.
- The longer you brew, the stronger your cold brew will be. The shorter you brew, the weaker your cold brew will be.
- Use filtered water
Just follow the 5 tips above, and you are good to go! Are you looking forward to making cold brew at home?